Thursday, May 31, 2007

Healthy Chocolate Cupcakes

In courtesy of dear-martha.com,


Chocolate Cupcakes

200 g dark chocolate
50 g butter
2 eggs
2,5 dl sugar
1 tsk vanilla sugar
1,25 dl flour
1 krm baking powder

100 g dark chocolate
½ dl whipping cream
Sprinkles

1. Put the oven on 175° Celsius.
2. Melt the chocolate in the microwave and blend with the melted butter. Whip eggs, sugar and vanilla sugar until it turns white, and pour the chocolate mixture into the bowl. Blend flour and baking powder and pour into the mixture.
3. Fill small cupcake tins with the mixture.
4. Bake in the middle of the oven for about seven minutes.
5. Now start with the icing: Crack the chocolate into small pieces and put them in a bowl. Warm the cream on the stove, and pour over the chocolate. Let it melt, and then cool down for a couple of minutes. Spread the cupcakes with the icing, and finish with sprinkles. If a present: put in a beautiful box and tie a ribbon around it.

For more about such recipes, read more here

Hope you enjoyed the beautiful recipe! :)

Cheers
Paul

Wednesday, May 30, 2007

5 Easy Tips to Picking Healthy Bread

It’s common to hear people say among themselves, “Should I eat Multi-grain or whole grain? Does the bread have enough fibre in it? Should it be thin-sliced/low-carb?” Then again when we make decisions upon getting bread products such as muffins, pancakes, wraps, bagels, and a whole bunch of other choices – our heads often end up in a whirlpool as we don’t know exactly what should we be buying!

Well, now let me share with you these wonderful tips for making a great choice then. The key is to keep your eyes pinned to the labels’ nutritional facts/ingredients. This guide is absolutely simple, and it will surely help you navigate to make the healthiest choice. (I'm just so health conscious, oh dear!)


#1 Let’s identify the Types of Flour

Whole wheat flour is the no.1 ranker in bread as it is made off complete grain, including the germ and the bran. That means, you would receive naturally from the grain all the healthy benefits!

Enriched wheat flour is flour that has been artificially enriched with certain nutrients that are lost in the procession of bread-forming, this often includes minerals like niacin, vitamin D, iron, calcium etc. You can say that despite adding back some of these nutrients; the bread still does not contain germ nor bran and isn’t as good as compared to the whole wheat flour!

Wheat flour looks and sounds similar to Whole wheat but does not contain the germ or the bran and therefore it is not entirely nutritious as whole wheat flour.

#2 Look out for the ‘Words’ on Labels

Often you see many types of words and ingredients listed on the labels – that keeps you confused as you don’t know exactly what to look out for to have yourself make the best choice whilst seeking the healthier option. Therefore, look out for breads that have the word “Whole” on the label. Bread with words like “Whole grain, whole wheat, stone-ground whole wheat” are kings upon making choices. These are the products that provide you the entire health benefits – as well as entire germ and bran.

#3 Read out the Ingredients List in Hierarchical Order

When you look onto a list of ingredients on a bread package, make sure you read it from top to bottom. This is because the first ingredient mentioned is always the largest amount which then descends by weight down the list until the last few ingredients. So now you know if the word “Whole wheat” appears far at the bottom on the list – it probably means that it contains very little content of that, however if it appears FIRST on the list – it has got to be rich and full of that ingredient. Pick those types of bread!

#4 Avoid bread Ingredient-marketing Gimmicks!

Sometimes you pick bread and on their package captions you read “made with whole grains” – noticed carefully the words used and you would be able to see that most of the time these breads do not always contain whole wheat. For example, “Made with Whole Grains Gardenia White Bread” uses enriched wheat flour, and not whole wheat flour! Whole wheat only appears 4th on the list of ingredients after water. Would you prefer bread with more water than true good old wheat? I guess not.

#5 Serving Size

This is one portion that’s many-a-time often unlooked! You have to check that out. Let’s say if you were to reduce your calorie intake, choose bread with thinner slices as they weigh less. You have to decide the serving size depending on your personal goals and perspective towards what you want to get!

For example, if you pick Brand “A” bread which has a serving size of 38 grams and 100 calories per slice vs Brand “B” bread with a serving size of 27 grams and 70 calories per slice – in a loaf, you’re actually cutting yourself down on 400+ calories!


p.s. I hope this article has added value in your search for making the right bread choices to stay healthy, fit and looking good!

Enjoy!

Paul

Tuesday, May 29, 2007

Wheat & Gluten Free Cake & Pastry Recipes

Hey guys!


It's been a few days since my last post. I've been busy but oh well. I have been reading about Wheat-Free, Gluten-Free Desserts recently and I thought I'd just share something more with you guys. Wheat-Free, Gluten-Free Recipes are for those people who're unfortunate to be wheat-intolerant or suffer a celiac disease. It's such a waste actually because wheat is like everything to me...! I cannot imagine living without it, seriously.

Simply put, if you have celiac disease and eat gluten, your body will not absorb the nutrition from the foods you eat. This will not only cause your lower-tract distress, but could also lead to further serious health problems!

If you think you might be suffering from the disease - check the Celiac Sprue Association to find out more about the symptoms (of which includes weight loss, skin rashes, fatigue, etc)

Anyway, below is a great Cinnamon Chocolate Cake recipe I thought I should share with you. :)

2 cups chopped pecans
1/2 cup melted butter
1/4 cup unsweetened cocoa
1 1/4 cups granulated sugar
3/4 teaspoon gluten free baking powder
4 eggs
1/4 tsp cinnamon
1 tsp vanilla
1/4 cup brown sugar

Preheat oven to 350F, grease a 9-inch pan. Place the pecans in a food processor or blender and process until it's very fine! Next, you add the butter, granulated sugar, cocoa, cinnamon, baking powder, eggs, and vanilla; allow it to process for 30 seconds. Scrape down the sides, and then process for another 30 seconds.

After so, you can pour the batter into the greased pan, and bake 40 minutes or until a toothpick inserted in the center comes out clean. Let cool 15 minutes; remove the sides of the pan and let it cool on the rack!

There you go, a brilliant recipe that makes 12 servings! :)

Monday, May 28, 2007

Peter makes Lethal Cupcakes


Hahaha.. I just love Family Guy!

Have a good laugh. I wanna make killer cupcakes as well! (I mean the ones that SELL)

Saturday, May 26, 2007

Solving The 6 Biggest Mistakes Faced When Baking Bread

Solving The 6 Biggest Mistakes Faced When Baking Bread

Baking Mistake #1
The most common mistake by far would be when you forgot to add salt when you mould your dough. The outcome is that this results in a really bland bread, and affects the rising of the dough even – Causing your bread to lie flat on top.

My solution to you is for you to post “stick-ups” and notes on places like your kitchen wall, fridge, recipe book, next time so that you will never ever have to forget about adding salt to your dough again! Don’t sacrifice a good bake because of poor memory!

Baking Mistake #2
When people heat up their kettles and water to add yeast in, they often accidentally leave it overheated. This is a huge mistake! It will destroy the yeast and your bread will not rise. You can correct this by investing a little in a good old cooking thermometer. That will make your temperature measurements and life so much easier for you!

Baking Mistake #3
Another common mistake is when people allow the bread dough to over rise, which then leads to it having to fall.

This happens many a time when people forget about their dough. As everyone gets a little busy, worked up, and over-excited – Who doesn’t forget little things as such?

Yet so, don’t worry! Solution: If the bread is already on the pans when it over rises, just use a simple pair of kitchen scissors to cut off all the excess dough on the unbaked sides of the loaves. Next, you segregate and roll the dough into small little balls of dough. Be patient, allow them to rise from about 20 to 30 minutes on a cookie sheet (oiled), then bake them on 350F for about 15 to 25 minutes as the bread rolls.

Remember to allow the loaves of dough to rise for another 10 minutes extra before having it baked extremely flat on top.

Baking Mistake #4
Your bread gets burned. Yes, nothing can get any worse than bread black as charcoal! To avoid that, have yourself be sure that you follow all baking times and temperatures strictly like a work timetable/routine. Again, do not be shy to make the timer your best friend – it could and would save your bread from getting roasted!

Also, keep in mind that temperatures vary from different oven types (Gas to electric). Therefore, make sure the temperatures used are constant in whatever oven you’re baking with.

Baking Mistake #5
Don’t forget about air bubbles when you bake! “Pockets” they call it, creates large holes inside the bread after it’s done baking. This makes your bread very fluffy and gives it poor texture and taste. It loses the aroma and quality as well.

The best solution would be to pinch those “pockets” whenever you notice them occurring in your baking dough before having it baked. This will inflate any such bubbles and save your bread from deterioration.

Baking Mistake #6
Ok…...last but not least, what flour should you use? Should you add some sunflower seeds? Add rye with oregano, and honey?

I know every once in awhile everyone likes to get creative but be sure to know your ingredients well before you attempt to jumble them all up and have them mixed! Imagine baking a large amount of loaves for your family on a weekend only to have them look you in the eye in dismay and disappointment of weird tasting bread they have had to put up with. Be sure to experiment with small amounts of such dough/ingredients in advance before you attempt to bake it large and huge in quantity!

Now I’m sure you know what to do and what not-to-do! Know your ingredients well, keep the 6 deadly mistakes of bread baking in mind - and you’re on the way to becoming a great successful bread maker!

Have fun and share with your friends about your baking adventures today.

Cheers! :)
Paul

(This article has also been featured on EzineArticles!)

Friday, May 25, 2007

I'm featured on EzineArticles!

I did an article on preparing 3D Birthday Cakes for kids and guessed what?

They gave me the status of an "Expert Author" over at Ezine Articles for that! Wow, I am feeling so honoured now!

Anyhow..here's a short preview of it for your reading pleasure :)


* 3 Secrets to Creating The Best Birthday Cakes for your Kids!

[Food-and-Drink] Don't you like being able to create stuff on your own? Be creative and try out something new today! If you don't know how to bake, can't or won't bake for some other reason or another - well let me share with you on how to make a birthday cake for your kid in a totally new perspective! Not all birthday cakes...


As Featured On Ezine Articles

Paul Chen

(Quick! Click the avatar to read the rest of it!)

I will write more articles soon. I'ld post them up on this blog as well. Just..be patient!

Soon, I would mention about healthier baking options - ways to eat healthier food outside of home, how to choose the right bread / what contents /ingredients to look out for / how to create a better diet with the right choices of bread when you shop at supermarkets out there....

It's going to potentially rich and valuable content that I've personally been following like rituals in my past dieting plans, routines and such to achieve my current physical attributes - So be sure to come back and learn out how I did so!

It's a pleasure sharing. It would be nice to hear from your stories, your recipes, your comments as well. So be nice, drop a comment, or an email, or a message at MyBlogLog or something.

p.s. Add me on your Feeds/RSS!

Cheers
Paul

Thursday, May 24, 2007

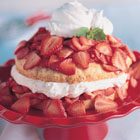
Share Your Favourite Strawberry Shortcake Recipes!

OOH I JUST LOVE STRAWBERRY SHORT-CAKES! Here's a great recipe I browsed through whilst surfing in search for the ultimate bake.

From the courtesy of Allrecipes.com


INGREDIENTS

* 3 pints fresh strawberries
* 1/2 cup white sugar
* 2 1/4 cups all-purpose flour
* 4 teaspoons baking powder
* 2 tablespoons white sugar
* 1/4 teaspoon salt
* 1/3 cup shortening
* 1 egg
* 2/3 cup milk
* 2 cups whipped heavy cream

DIRECTIONS

1. Slice the strawberries and toss them with 1/2 cup of white sugar. Set aside.
2. Preheat oven to 425 degrees F (220 degrees C). Grease and flour one 8 inch round cake pan.
3. In a medium bowl combine the flour, baking powder, 2 tablespoons white sugar and the salt. With a pastry blender cut in the shortening until the mixture resembles coarse crumbs. Make a well in the center and add the beaten egg and milk. Stir until just combined.
4. Spread the batter into the prepared pan. Bake at 425 degrees F (220 degrees C) for 15 to 20 minutes or until golden brown. Let cool partially in pan on wire rack.
5. Slice partially cooled cake in half, making two layers. Place half of the strawberries on one layer and top with the other layer. Top with remaining strawberries and cover with the whipped cream.


---------------------
p.s. If you have any better strawberry shortcake recipes/or comments on how to make this one better, do leave a comment behind!

Cheers
Paul

Buy yourself a Wall Toast Calendar!


I Love Toast! Wall Calendar

I Love Toast! Wall Calendar
Parmentier wrote, Bread is a generous gift of nature, a food that can be replaced by no other. Show your love to toasted bread with this product or send it to a toast loving friend.


Hahah. I just love stuff from Cafepress.com >> They make really unique gifts. I just thought that perhaps I should be saving up more money so I can myself something really cool like that Toast calendar hanging on my wall!

Cheers

Chewy Junior v.s Donuts? Today's baking take-away

Have you guys ever tried the Chewy Junior Pastry from Tanjong Pagar?


Heh. It has this really unique feel towards it. It's veryyy smooth, it's actually a toasted marshmallow mixed with some sort of flour with edible toppings. I tried the apple one - it looked quite attractive and appealing to my eyes however they failed to impress!


I feel so strongly that the guys from Chewy Junior basically tried to re-conceptualize and steal Vinco Donuts' idea by making a similar product with a totally different texture. However, donuts still reign I guess. They're round and pack more punch when you munch over them as they leave your taste buds begging for more!

..Til then, I will keep you updated on crazy bakes and such. I will attempt my own recipes and share it with you soon.

Real soon!

Wednesday, May 23, 2007

How do I make tasty Banana Muffins?

Ever felt like your bananas were going to spoil and rot and you have to bear the guilt of wasting them by throwing them away into the bin?

Well, make something good out of it - make a muffin! I really love banana muffins. I saw this video on youtube and thought that it was really cool. Decadent bananas can be made into excellent muffins. So try it out!


Cheers! :D
Paul

Tuesday, May 22, 2007

Dim Sum Fans: Tau Sar Pau anyone?

Hi people!

Don't you guys have a fetish for pau?
Free Image Hosting at www.ImageShack.us

Well ok lah, personally I'ld admit that I have a secret fetish for pau - I like to eat them (Even though it is not really "Baked" - it's still a type of bread right? Or bun - and it's steamed! So I can lie to myself and feel healthier for the day!)

To all those who do not know what I'm talking about, don't worry - you can read about Dim Sum here - thanks to Wikipedia.

My mum just brought home some wonderful Tiong Bahru Pau (237 Outram Road). She got Char Siew(Pork), Da Pau(Big chicken bun with egg) and Tau Sar Pau(red bean).

Well I really like the Tau Sar Pau alot for some reason or another cause it's usually small and petite unlike the others, it has a really smooth texture - and the red bean when steamed hot and fresh makes my tongue running with saliva. It's like some concise short moment of a hysterical delirium or something. Hahah.

Here, check out the irresistible Tau Sar Pau from Tiong Bahru Pau & Snacks!

Free Image Hosting at www.ImageShack.us

Well, that's about it today. I think I deserved to eat a little more today cause I trained really hard earlier at Punch Academy, heh.

More stories to come in the week. Drop by!

OREO Cheesecakes! Yum!

Don't you guys just love to eat Oreo Cheesecakes?

Well, personally I really do. I had this cake as a birthday gift for a friend last year.

Free Image Hosting at www.ImageShack.us

Yep. It's so rich and tasty and I felt so good munching on it. It was a brief moment of indulgence as I cut and stole a slice or two from it. I then thought maybe I should go figure out how can I start baking oreo cheesecakes on my own perhaps, heh! So I decided to go hunt for some help..heh heh :D

Ok, this recipe was shared from my cousin and she has been baking for about 6 years. I am about to share it with you guys. I've tried it once, and I tell you you won't regret trying it out. It's irresistibly delicious!!

Now, without any further due - the recipe, revealed!

Sarah's Secret Homemade Oreo Cheesecake!

CRUST:

1 1/4 c. chocolate cookie crumbs
3-4 tbsp. butter, melted

FILLING:

1 1/2 c. whipping cream
3 (8 oz.) pkgs. cream cheese, softened
1 c. sugar
24 Oreo cookies

FROSTING:

4 oz. semi-sweet chocolate
1/2 tsp. vanilla
1/2 c. whipping cream

CRUST: Combine cookie crumbs and butter. Press into a 9" or 10" spring form pan. Place in freezer while preparing filling.

FILLING: Whip cream until stiff peaks form. Place in refrigerator. Whip cream cheese until smooth. Add sugar and blend. Coarsely chop 24 Oreo cookies and fold into cream cheese mixture. Fold in whipped cream. Turn filling in crust and spread evenly. Cover and refrigerate at least 4 hours. Loosen cheesecake by running knife around edges. Release sides of pan.

FROSTING: Melt chocolate over low heat, stirring constantly. Cool slightly. Whisk in whipping cream and vanilla. Glaze top and sides of cheese cake with frosting mixture. Place in refrigerator about 30 minutes or until hardened.

Food Photography - Part 1 - Preparing for the Shoot


Hey everyone!

My name is Paul and I am really new to the vast world of food and baking blogging as it seems.

I wish to share all my ninja baking secrets, tips, screw-ups, stories, jokes, recipes, love, pictures, plus a lot of love and recipes yet again with everyone! :)

So please drop by, leave a tag or comment on my post/or at my tagboard. I'ld be glad to reply your enquiries. Just don't throw eggs and flour at me ok? That'ld be nice of you to just say hi even. :)

May everyone in this beautiful world of bread and baking come and share our wonderful stories!

Here's a great article and MY VERY FIRST POST on Food Photography. You really should take a read and share it with your friends! :)

-----------------------

Food Photography - Part 1 - Preparing for the Shoot

Food is a fascinating and challenging subject to photograph, and done properly can evoke both an appealing and emotional response. The art of photographing food requires a vision of how the item should be depicted in an appetizing and appealing manner. Lighting, surrounding props, and background all add to the success of a winning image. Most importantly, however, is the display of the food item itself. How fresh does the product appear, does it look juicy, is it hot or chilled, does it seem as if it just came from the kitchen? All of these considerations should be thought-out and planned to make the item look as appealing as possible, and go into making the shot a success.

The first step is planning the food shoot. The client should have a list of items they want photographed, and an idea of how and where the photographs are going to be used. For instance, if an item is going to be used on a horizontal menu board and a vertical print ad, then the photographer needs to make two versions of the shot to accommodated both uses.

One of the most important things to consider is who is going to prepare the food for the photos. If the client is a food establishment such as a restaurant and has chefs, and has a set presentation for serving an item, then they need to be involved in the efforts. However, the chef may not be the best person to prepare the food for the photo session. You may need to add valuable member to the project called a food stylist. The stylist can do several things, like prepare the food for the shot, or guide the chef as to how to prepare the item, and then put the finishing touches on the item to make it look as appealing as possible. Usually an item is not prepared the same way for photography as it is for consumption. This is because many times a less heated food item just looks better than a fully cooked one. A stylist , in addition to preparing the food, also helps to construct the photograph by helping to prop the shot. Items surrounding the food, such as a colored napkin of a fork, can greatly enhance the scene. The stylist can also be responsible for buying the food and props. Props, such as forks, knives, glasses, ingredients, etc. should also be discussed. Decide what props should be brought to the shoot and who is going to be responsible for supplying them. Oftentimes the client, photographer, and food stylist will all contribute props to the effort.

The location of the photography is very important to a successful food shoot. If the client has a restaurant or kitchen then many time its more convenient for the client to do the photography at their facility. Ideally there needs to be an area cleared of tables, chairs, and free of customers if the photographer is going to do his best “on location”. When shooting packaged items or produce, its often necessary to do the shoot at the studio. Generally a photographer has more control over lighting, more room, and a greater access to equipment and props in the studio. A studio with a kitchen is ideal, or at least there needs to be is a decent sink and prep area to work in. Planning carefully before the shoot helps to organize your efforts, and serves to ensure a smooth and productive outcome for the photo session.


Robert Bruni is a San Diego photographer with over 20 years experience in commercial photography. View his portfolio at http://www.ambiencephoto.com. His work as been highlighted in numerous publications as a creative San Diego - Los Angeles photographer and a regional Southern California photographer.


Article Source: http://EzineArticles.com/?expert=Robert_Bruni